


LKS
-
Content Count
175 -
Joined
-
Last visited
Posts posted by LKS
-
-
Energy saving NSX !!! Cool !!! -
Thanks for the comments! -
Very nice decals!!! -
Cool project! -
Cool Mr. Eight!!! Nice cut!!!
The best part is that you didn´t damaged the original decals! -
Cool dinner!
I´d like to be there! Congrats to Daniel for those awesomes Ectos!!! Congrats to everyone involved in the organization! -
Hi buddies!
This customs was based on the Mercedes Benz CLK GTR below. The cast used was the CLK GTR Street Version 1:64 from Maisto Fresh Metal, it´s not the exact real model, but the result is very close to the real one! Hope you enjoy it!
There is one main stuff I ommited in the custom that is present on the real car: There is a man stamped on the right side, but as I only give rides to women, the man was ignored, and I applyied the girl decal on both sides!!!
Hope you support my decision! ;D
-
That´s correct!
But please take care, depending on concentration (all nail polish removers are a solution of acethone) you may remove the main painting!!!
Be careful to not demage the base paint!!!
If it´s your first job I recommend that you try something easier!
The first part removing large areas is quick and easy, but the hard work is to remove near the corners, windows columns, grooves. You take aproximately 15min in the first part and more than an hour to do the detailed cleaning!!! Also be patient, do not try to remove everything in a few minutes!
Good luck!!!chee keng hong wrote:HWRB28 wrote:chee keng hong wrote:Where can I find the "acetone" here???
nail polish remover bro, gong xi-gong xi
Nail remover??? Oh..I c!! Later get a bottle from my daughter!!
Btw....thanks for the info!
And thanks LKS for the great tips...too! -
impel wrote:cool i would repaint the chroom details. headlights and grill enz.. just like the boulevard series.
gr marco
Yeah! I gonna do that!!! Thanks!!! -
wildspirit wrote:sahama wrote:Bagus sekali LKS
translations for LKS , Very good one LKS - Sahama
Thanks a lot wildspirit and all you guys enjoying this tip!!!
Thanks also for the translation!!! I would love to learn your language!!! -
thanks for the pics!!!
-
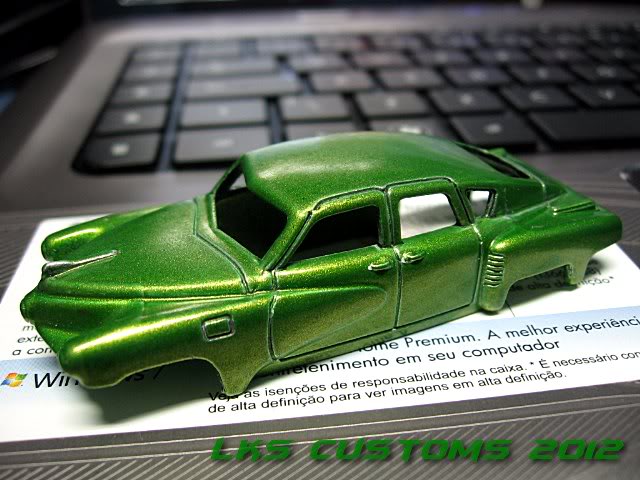
I don´t like the original tampo, since it doesn´t match with the car style, so I decided to strip it off completely!!!
It´s still missing some detailing, like the head lights, hood ornament etc...
Starting with a piece of cotton cloth and acethone (diluted), after, I used a cotton swab and finally a toothpick for cleaning the grooves
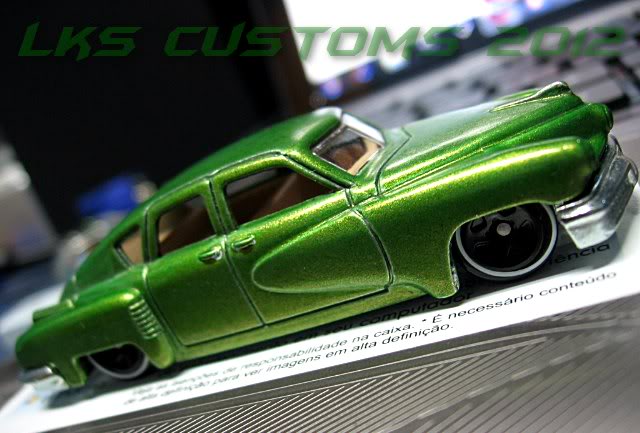
80% removed
95% removed
That´s the best I could do!!!
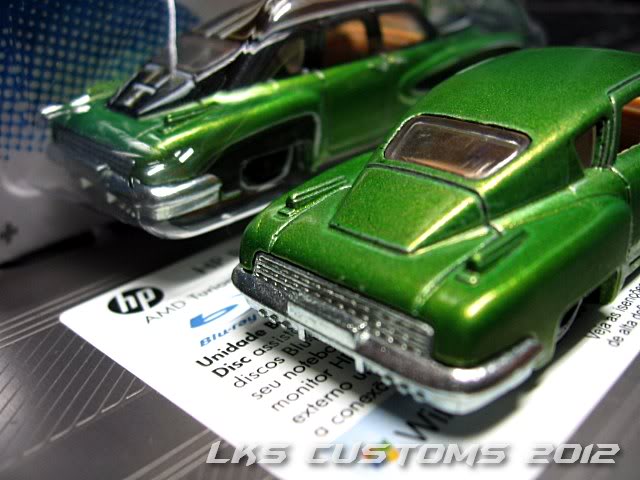
Ready!!!
Now, side by side with his brother from the Boulevard series!!! -
nice cut job! now we can see the luxury leather interior!!! -
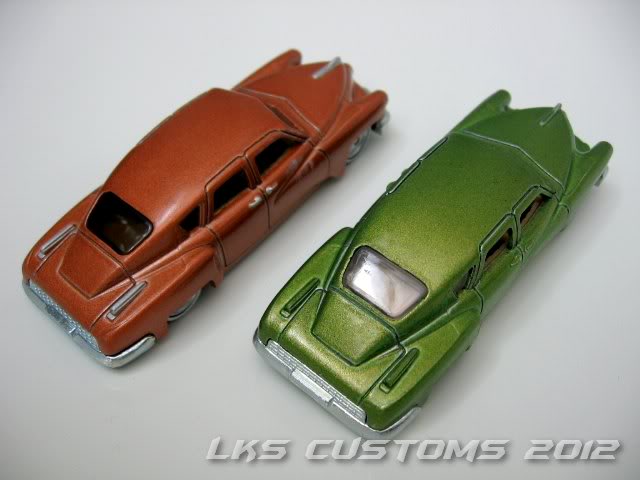
Very nice colors combination!!! -
Nice and clean!!! -
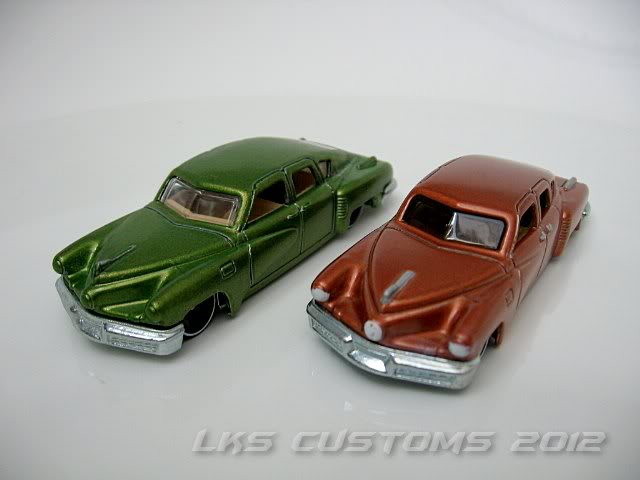
Nice couple!!! -
100000000X better than the super!
more pics, more pics!!!!!!!!!!!!!!! -
Very nicely done job! Your work is impressive!
But I still don´t like the casting... -
Awesome job!!! -
superb!!! no... fantastic idea!!! no... incredible, genial, impressive, I can´t find the words to describe this awesome idea!!!
Your job was perfectly done!!! I love the Alfa 155!!!
congrats!!!!
Luiz -
thanks for those sweet comments guys!
Now, my bikes will never fall again!!! -
eight wrote:awesome tips as usual... i like the 56 ford panel delivery but mattel have seal its opening hood too...
Thanks Sinclair and Mr. Eight!
I´ve done the same job on the 56´ Ford too!
-
Hi guys!
Updating the topic!
This bike was a gift from a friend of mine!
Then I made the center stand asap!!!
Thanks for all sweet comments buddies!!! -
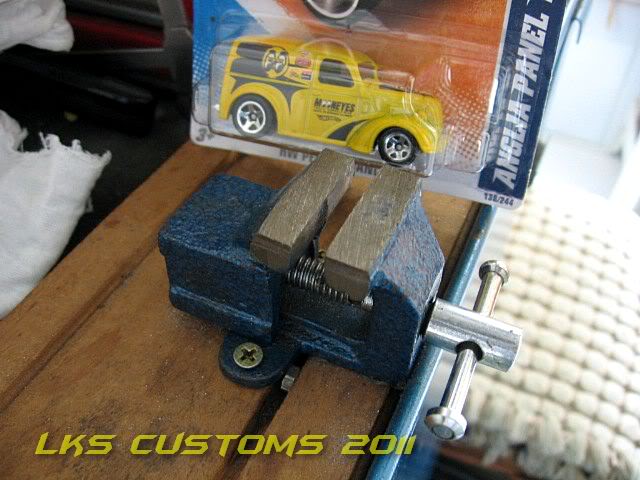
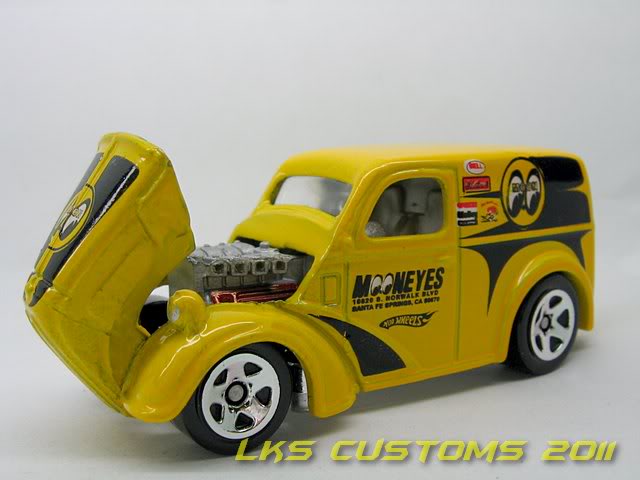
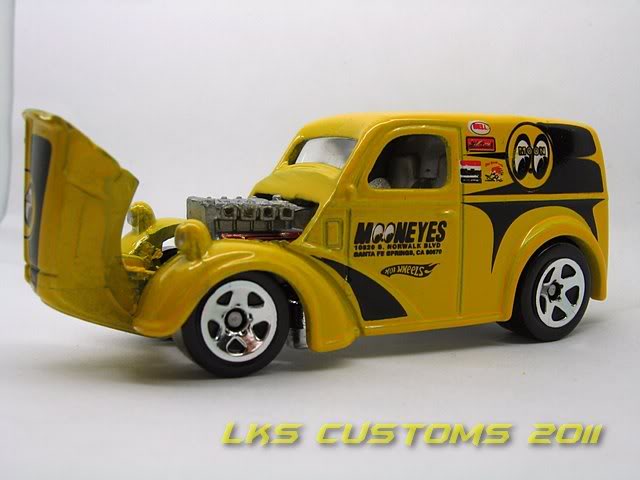
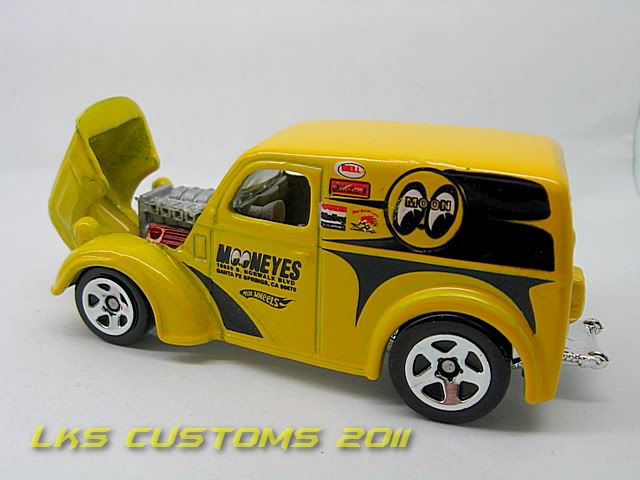
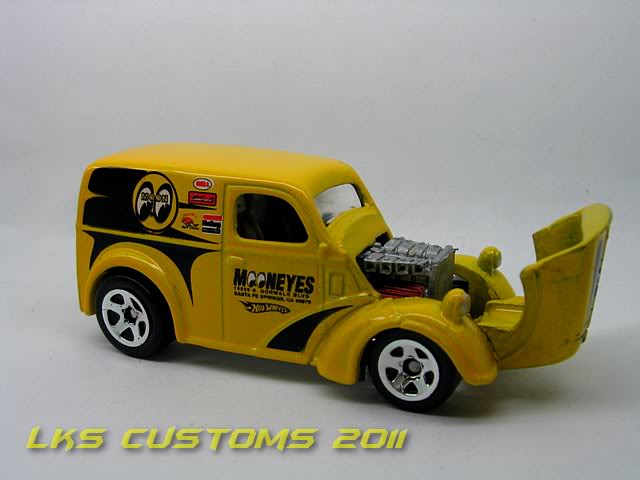
As everybody knows, due to costs reduction, Mattel simplified many castings, like the Anglia Panel Truck MOONEYES, Buick Grand National, 56 Ford, Dodge Charger and etc... Now they don´t have movable parts anymore...
Then, I decided to cut and open the hood by myself!!!
The front post is located under the windshield base, so it was easy to cut off the hood and reassemble the cast w/ the chassis!
The two original posts were used to close with screws.
Tools and materials needed:
- Jewelry´s saw
- 1 mm dia drill bit
- Drill (electric or cordless, anytype)
- Pliers
- Steel axle or pin
- Yellow nail enamel
- Small vise
Note: No additional cast was damaged on this project!
Hold the cast in the vise securelly with a piece of cloth to prevent scratches on the painting:
Do the first cut following the line between the fenders and the hood:
Do the second cut on the base of the windshield until you find the first cut:
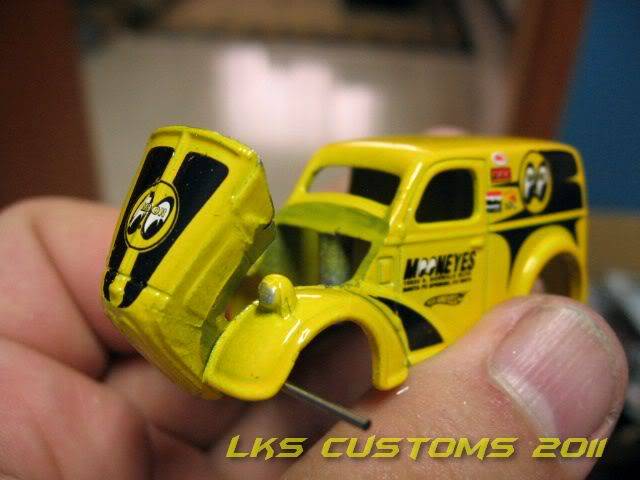
Detach the hood:
The hood off the body:
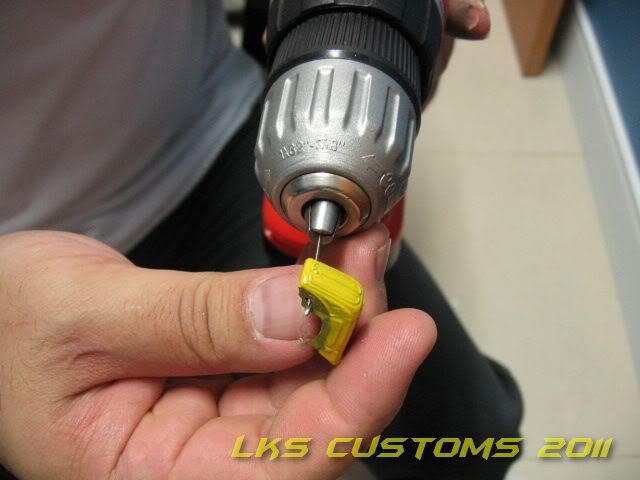
Drill a hole from the fenders through the hood:
Testing the articulation with the drill bit, the cut sections were already painted with the nail enamel:
Bottom view showing the two screws:
The engine with some detailings:


 thanks for the pics!!!


Mustang falken drift
in Other Custom
Posted
I was going to say this!!!